Pages

Saturday, December 14, 2013

Chocolate coated Christmas Honeycomb

Christmas Honeycomb
This is so easy to make and irresistible :-( not good when you're on a diet which is why it got put in bags pretty damn quick!!


Ingredients
10 tablespoons white sugar
4 tablespoons golden syrup
2 teaspoons bicarbonate of soda

(Some recipes have vinegar in but this is easier and nicer) 

Christmas colour sprinkles, edible glitter etc
Chocolate - good quality milk or plain I use half and half as it's a better taste. I think white chocolate would be too sweet but that is my personal opinion.

Remember you have to work fast and have a sink of hot soapy water for the pan to go in asap or it's hard to get off the pan.

So put the sugar and syrup in a pan and melt together then boil for about 4 mins till it goes a dark golden colour.
Here is the be quick part
Take pan from the heat and add bicarbonate and whisk fast then pour onto the tray and tilt round to get it to spread. 


DO NOT TRY TO SPREAD IT WITH A KNIFE, SPATULA ETC - IT WILL GO WEIRD
(Get the pan into the water to clean it now)

When cool and hard, melt chocolate in a pan over hot water or in microwave.  Pour over the honeycomb and while still melted sprinkle with decorations.

When the chocolate has set, break into pieces and put into bags, un-bagged it should keep for a few days in a cool dry place in an airtight container, if you can resist it that is!!

enjoy xx


Friday, November 15, 2013

Ready for the Fair

I am finally ready for the Christmas Craft Fair tomorrow.  I always do a trial run to see how it will look and I am surprised just how much I have ready.  Here are a few shots of my table.


Monday, November 11, 2013

Absent

Hi Blogging friends, sorry I have been absent from Rain or Shine for a while.  This year has been crazy and crafting took a back seat to my diet and other stuff.

We had a big party in the summer that took 6 months of preparations and the need for installation of a new Pool.


I have been concentrating on my diet and today got to the 4 1/2 stone off mark which has made me very happy.
Diet flipper I made at the beginning of my diet. Instructions HERE on my diet blog
I have been crafting the last few weeks as it is Christmas Craft Fair time again.  Here are a few pictures of what I have been making for the first of the markets, this Saturday.
Link to artwork
These are made from images I bought from Aimee Asher  they are by Laurie Furnell my favourite designer there.
Gift Tags
Post-it Notes
Chocolate wrapper Penguins from http://stampinsteps.blogspot.co.uk/2011/09/friday-freebee.html
Angel wrapper Aimee Asher again
Lavender bag chckens
Fabric trees, adapted from an idea by Debbie Shaw on YouTube
Felt Owl key rings cut from a Marianne Die

Hope to post more stuff soon, thanks for looking today xx

Tuesday, April 30, 2013

Behold Beauty mirror Altered Art

 This is my entry for the Sunday Stamper Challenge at Hels Sheridans blog page "Ink on my fingers" Pinkleart Blog.  This week it is blue and stamping, I don't do much in blue for some reason but it was nice to do something other than pink or lilac!!

Take a charity shop bargain, mirror for 50p and get messy :-)  I found this on one of my rummaging sessions and it is a nice'ish little mirror but it needed work to turn it from boring cream to something prettier.  Cheap objects like this are great for practicing on, after all if it goes wrong it goes back to the charity shop!!  It gave me a chance to try out some of my new stuff and stash bust my old too.  So here is how I did this with as many details as I can recall.
Lol, the downside of trying to photograph mirrored objects
The wood frame is painted in pearl acrylic paints, I tried to get the brush marks to show for effect so a dry brush method on the final coat helps.  I used two colours of pale blue's .
Randon stamping using faded jeans distress ink and with a brick effect and crackle stamp to suggest texture.
The torn paper is two pages from an old flower book, I washed this with a wet  brush with hardly any paint on to hint at colour. Run through the Cuttlebug in a bark effect folder and a flowery one, then did "ink to paper" with distress ink to show up some of the embossing detail.  Tear into pieces and inked the edges with more faded jeans ink and stuck on with wet glue

 Martha Stewart's NEW silicone moulds for the letters made with UTEE, these are great and give great results, the letters come out so easily and they are quite detailed too
Pour UTEE onto Texture tread rubber and use a butterfly cutter, Shape while still warm,  brushed with Mica powder. The other small butterfly is a Martha Stewart mould.  Various die cut leaves and sprigs were dipped into clear UTEE as well as the flowers
 Paper for the flowers is K & Co
 I used Tim Holtz Tattered Florals die, Marianne and Crafts Too die's for flowers and leaves. I love the look they have after being dipped into UTEE, like real crystal flowers

 Close up's of the book pages after inking, embossing and tearing
Thanks for looking xx

Friday, April 26, 2013

Enjoying the sun

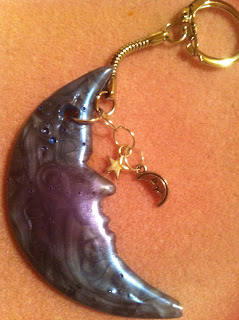
Well today we have rain, of course we do it's the weekend!  I have been making the most of the sun this week though.  I have done some crafting for the Mystic Moon Festival that we host in August,  made some jewellery and key rings to sell.

The highlight though this week was welcoming some new girls to our family.  No not children, Chickens.  I missed the sounds and eggs so I went to market this week and bought some.  Nice little Rhode Island x hens and good layers, even after the stress of being moved round on Tuesday I had two eggs before bedtime from them and a lot more since :-)

Photo's, thanks for calling by x


Couldn't leave Betsy out she got a necklace too and very pretty she looks :-)


Tuesday, April 23, 2013

Gardening break

Wow SUN!!!  I had to get going on the place this weekend.  After the winter it all looked a little derelict :-(  I have mown, cut trimmed and tidied for England this weekend, with a place the size of ours it looks like a drop in the ocean but at least I have made some in-roads.  Sorry, lord that sounds so pretentious  believe me it's nothing special just loads of it :-(
Gerry has re-fronted his workshop and made new doors, don't they look swish.  He even painted them, I would point out he is not allowed to paint indoors as he gets it everywhere..lol   Bless him:-)


Greenhouse ( derelict shed actually) ready for plants and tomatoes etc. Front garden, well a bit of it, looking more presentable.  I have a lot to do but a new stash of goodies arrived so trying to share time between out and indoors.

  
BEFORE
AFTER
BEFORE
AFTER
I can get into the chicken house again, it was feet high in brambles and weeds before :-(
My war wounds from the brambles...ouch
Paddock not to bad yet, give it time!

Planted 17th April
Today 23rd April, I love my utility for getting seeds going it gets so warm, better than the greenhouse this early in the year